NetHang
Overview
NetHang is a web-based network quality simulation tool that allows you to create and manage network paths between LAN and WAN interfaces. Ideal for use with software routers on Linux platform. It focuses on simulating weak network (poor network) conditions, with built-in scenario models(Edge, 3G, 4G, Wi-Fi, Starlink, etc.) and combinations of parameters such as packet loss, delay, jitter, and bandwidth limitation, etc. It helps you simulate various network conditions and monitor their effects on traffic.

How NetHang looks like:
Preparation
In simple terms, NetHang needs to run on a Linux-based software router. If you already have such a software router device or are familiar with how to set up the environment, it will be very convenient.
If not, please follow the instructions below step-by-step to build one. Depending on your hardware and network environment, you may encounter different issues, which we can discuss and troubleshoot on GitHub.
Hardware
A Ubuntu 22.04 LTS server (or desktop) with at least TWO network interface cards (NICs) is required.

Software
To install the required packages, run the following command:
sudo apt update; sudo apt install iproute2 iptables libcap2-binCheck command paths:
which tc; which iptablesThey are typically located in /sbin/tc and
/sbin/iptables (or /usr/sbin/tc and
/usr/sbin/iptables).
Grant the CAP_NET_ADMIN capability, which is required for tc and
iptables:
sudo setcap cap_net_admin+ep /usr/sbin/tc; sudo setcap cap_net_admin+ep /usr/sbin/xtables-nft-multiVerify the permissions:
iptables -Ltc qdisc add dev lo root netem delay 1ms;tc qdisc del dev lo rootIf the output are without errors, the permissions are set correctly.
If not, you may need to reboot the machine.
Step 1: Check Current IP Forwarding Status
Before proceeding, check whether IP forwarding is currently enabled on your Ubuntu machine:
cat /proc/sys/net/ipv4/ip_forwardIf the output is 0, IP forwarding is disabled. If it's 1, it's already enabled.
Step 2: Enable IP Forwarding
To enable IP forwarding temporarily (valid until the next reboot), run:
sudo sysctl -w net.ipv4.ip_forward=1To make the change permanent, edit the /etc/sysctl.conf file and
uncomment or add the line:
net.ipv4.ip_forward=1Then, apply the changes:
sudo sysctl -p /etc/sysctl.conf
Step 1: List Network Interfaces
Identify your network interfaces using the ip command:
ip addrYou should see a list of interfaces like eth0, eth1, etc.
Step 2: Configure Network Interfaces
Edit the network configuration files for your interfaces. For example, to
configure eth0 and eth1, you'd edit /etc/network/interfaces:
sudo vi /etc/network/interfacesHere's a sample configuration for eth0 and eth1:
# eth0 - Internet-facing interface
auto eth0
iface eth0 inet dhcp

# eth1 - Internal LAN interface
auto eth1
iface eth1 inet static
    address 192.168.1.1
    netmask 255.255.255.0
Step 3: Apply Network Configuration Changes
Apply the changes to network interfaces:
sudo systemctl restart networking
To enable NAT for outbound traffic from your LAN, use iptables:
sudo iptables -t nat -A POSTROUTING -o eth0 -j MASQUERADEMake the change permanent by installing iptables-persistent:
sudo apt update
sudo apt install iptables-persistent
Follow the prompts to save the current rules.
This step is optional. If you want to use DHCP to assign IP addresses to devices on the LAN, you can configure the DHCP server.
Step 1: Install DHCP Server
If you want your Ubuntu router to assign IP addresses to devices on the LAN, install the DHCP server software:
sudo apt update
sudo apt install isc-dhcp-server
Step 2: Configure DHCP Server
Edit the DHCP server configuration file:
sudo vi /etc/dhcp/dhcpd.confHere's a sample configuration:
subnet 192.168.1.0 netmask 255.255.255.0 {
  range 192.168.1.10 192.168.1.50;
  option routers 192.168.1.1;
  option domain-name-servers 8.8.8.8, 8.8.4.4;
}
Step 3: Start DHCP Server
Start the DHCP server:
sudo systemctl start isc-dhcp-serverStep 4: Enable DHCP Server at Boot
To ensure the DHCP server starts at boot:
sudo systemctl enable isc-dhcp-serverInstallation and Starting
From PyPI (Recommended)
You can install NetHang from PyPI using the following command:
pip install nethangFrom Source (For Developers)
You can also install NetHang from source by cloning the repository and running the following command:
pip install .Starting NetHang
Starting NetHang is very simple. Just run the following command:
/path/to/nethang
NetHang will running on port 0.0.0.0:9527 by default. You can access the website by any browser.
You can login with the default username and password: admin.
Then you can start to use NetHang.
Simulation

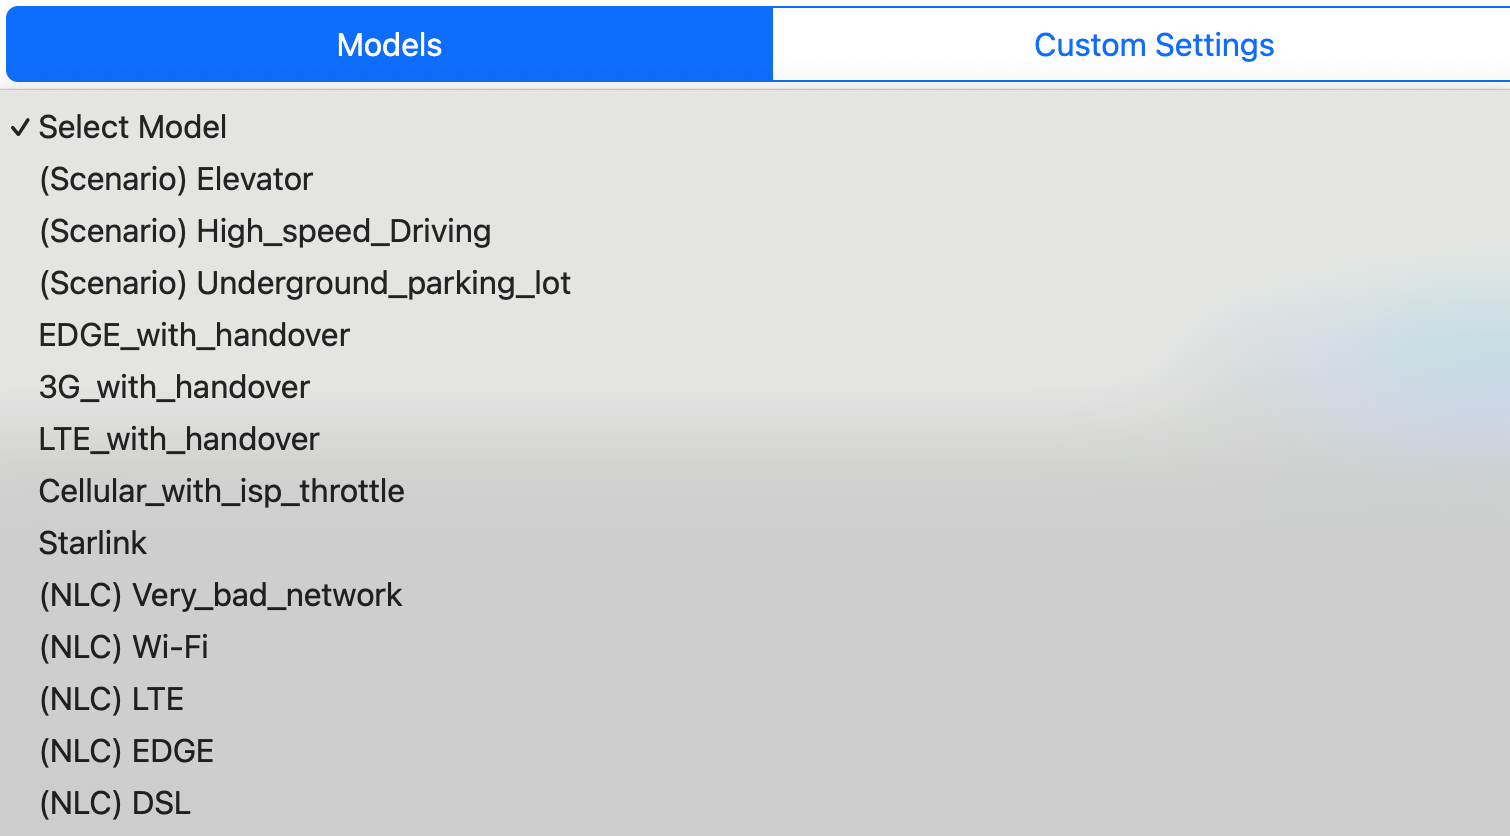
Models
Pre-configured network models that simulate common network conditions.
- Network detection: Assessing actual network quality by transmitting and receiving diverse protocol packets.
- Third-party models: Like Network-Link-Conditioner from Apple. etc.
- Technical analysis: Analyzing network traffic patterns and characteristics.
- Custom models: Create your own models by editing the configuration file.
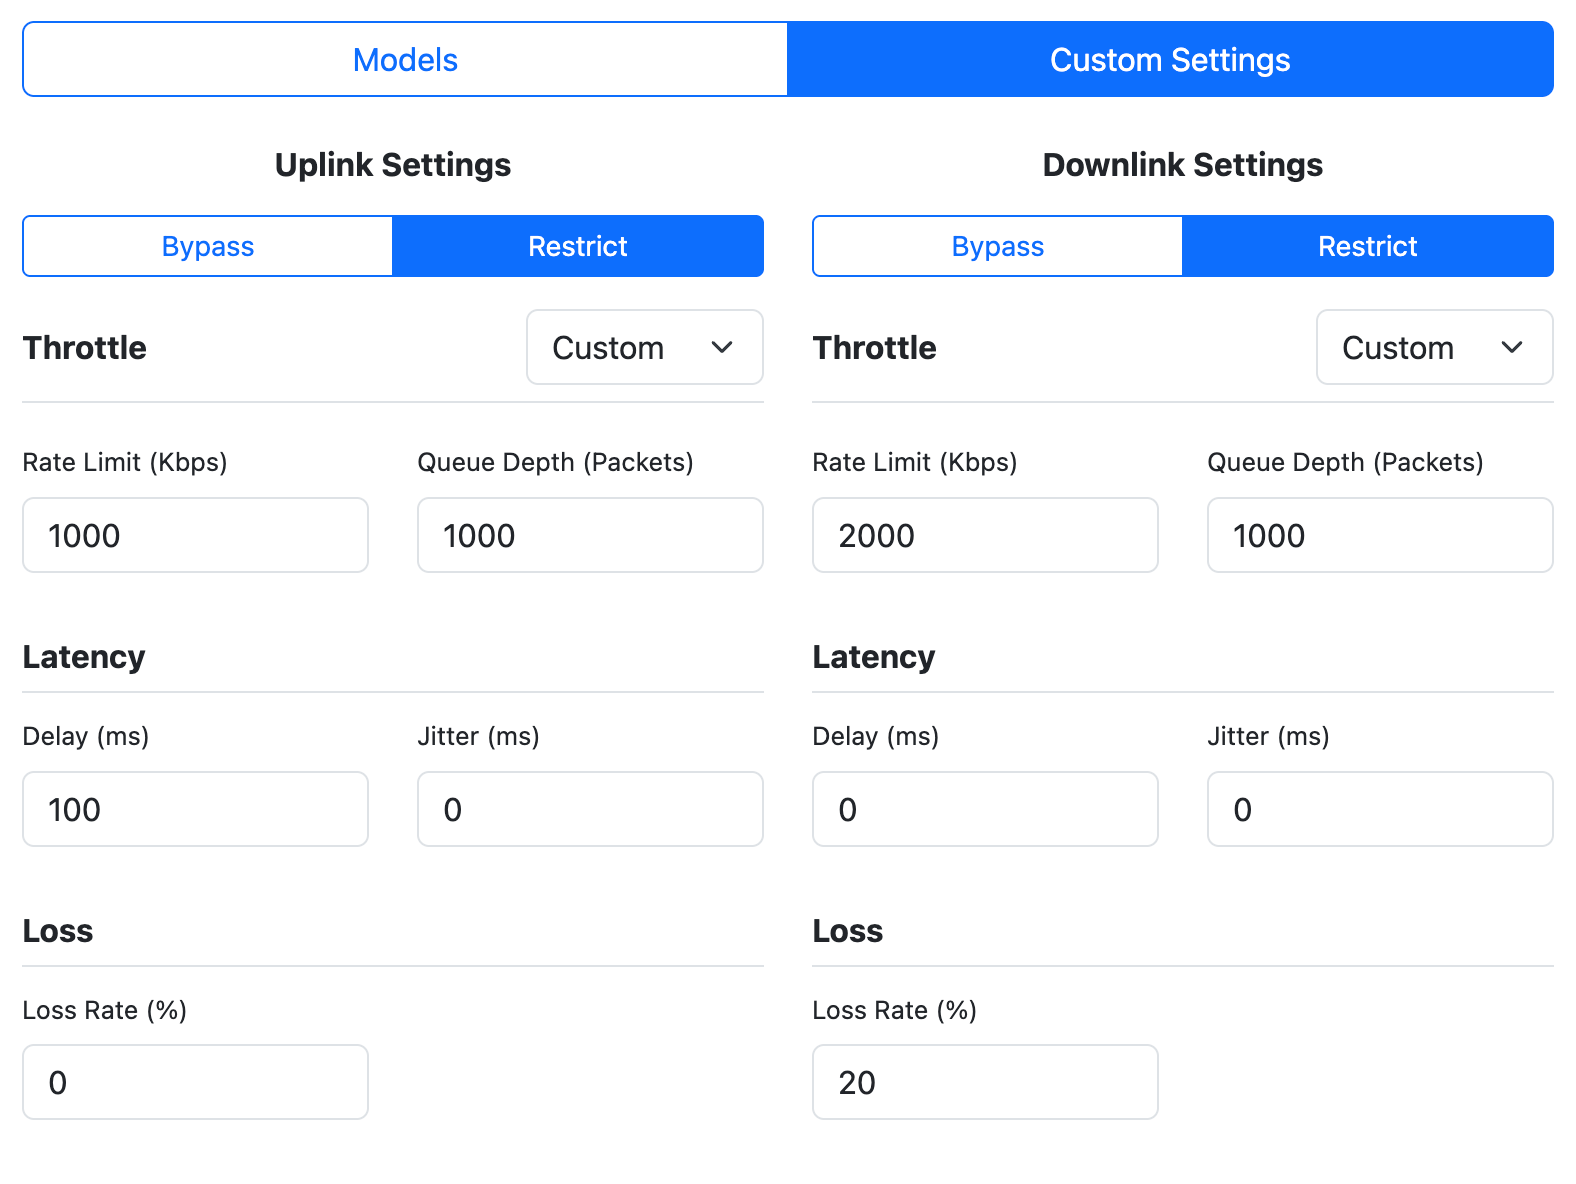
Custom Settings
Configure specific network parameters:
- Bandwidth (Kbps)
- Queue Depth (Packets)
- Delay (ms)
- Packet Loss (%)
- Jitter (ms)
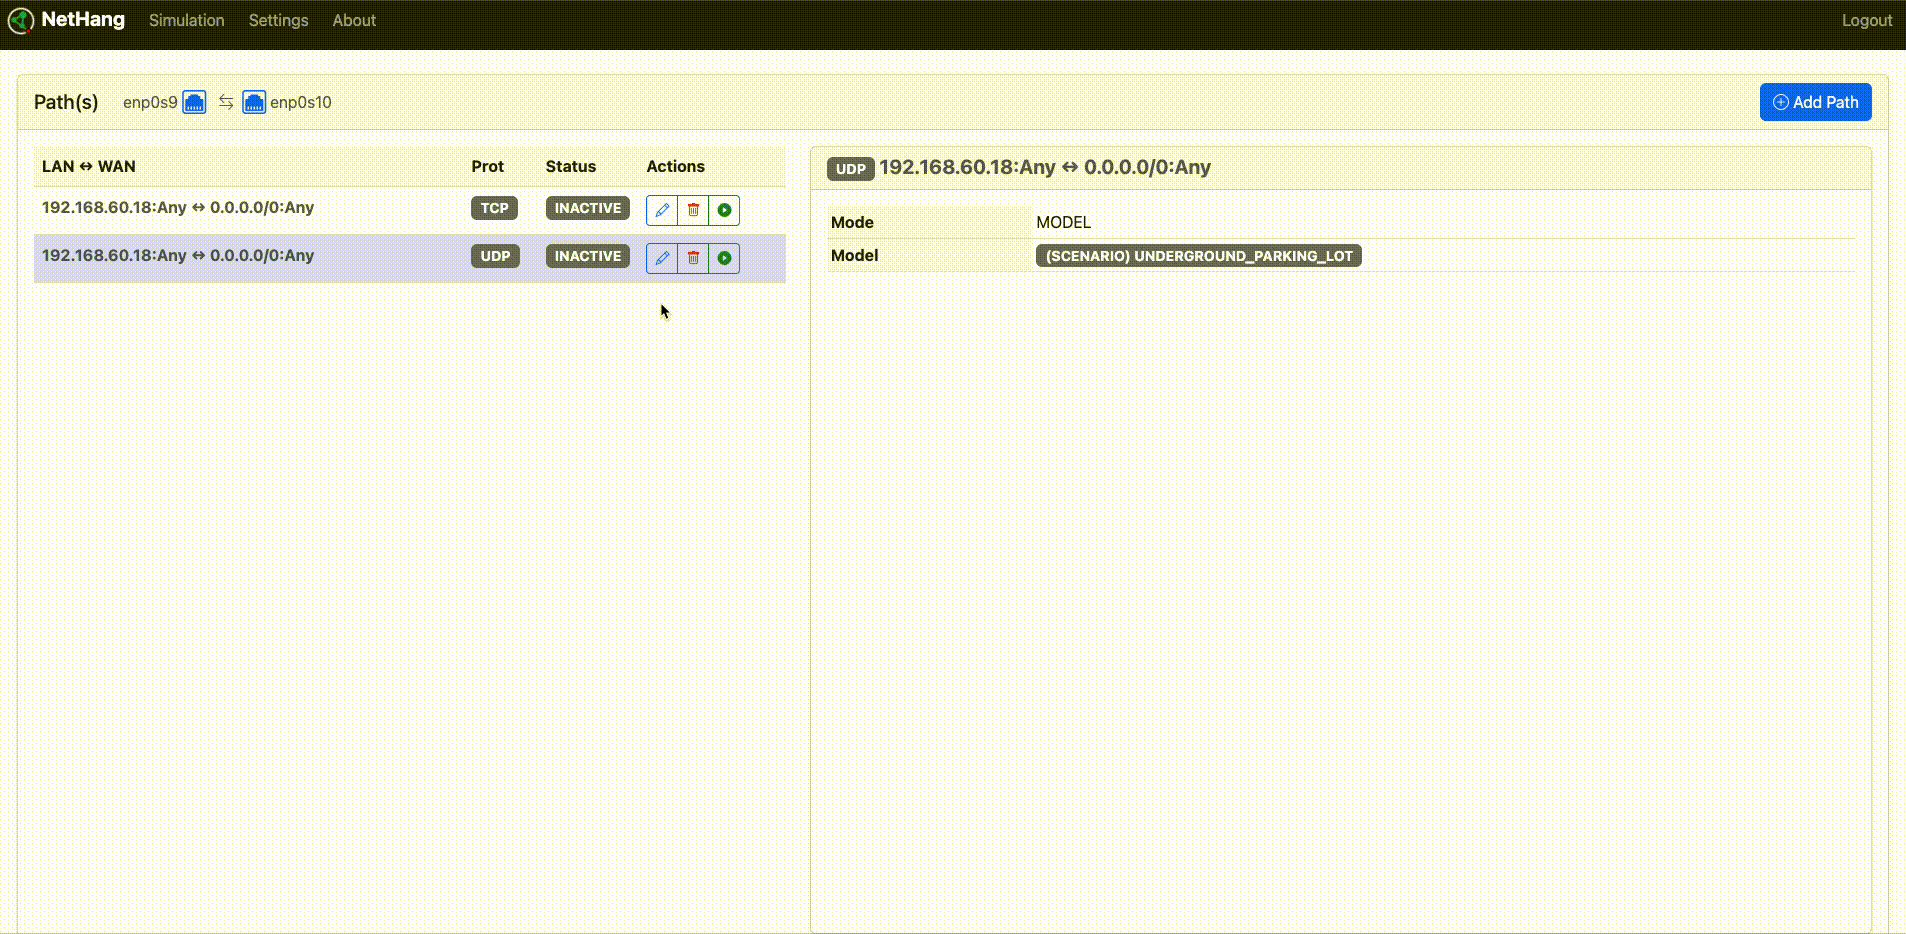
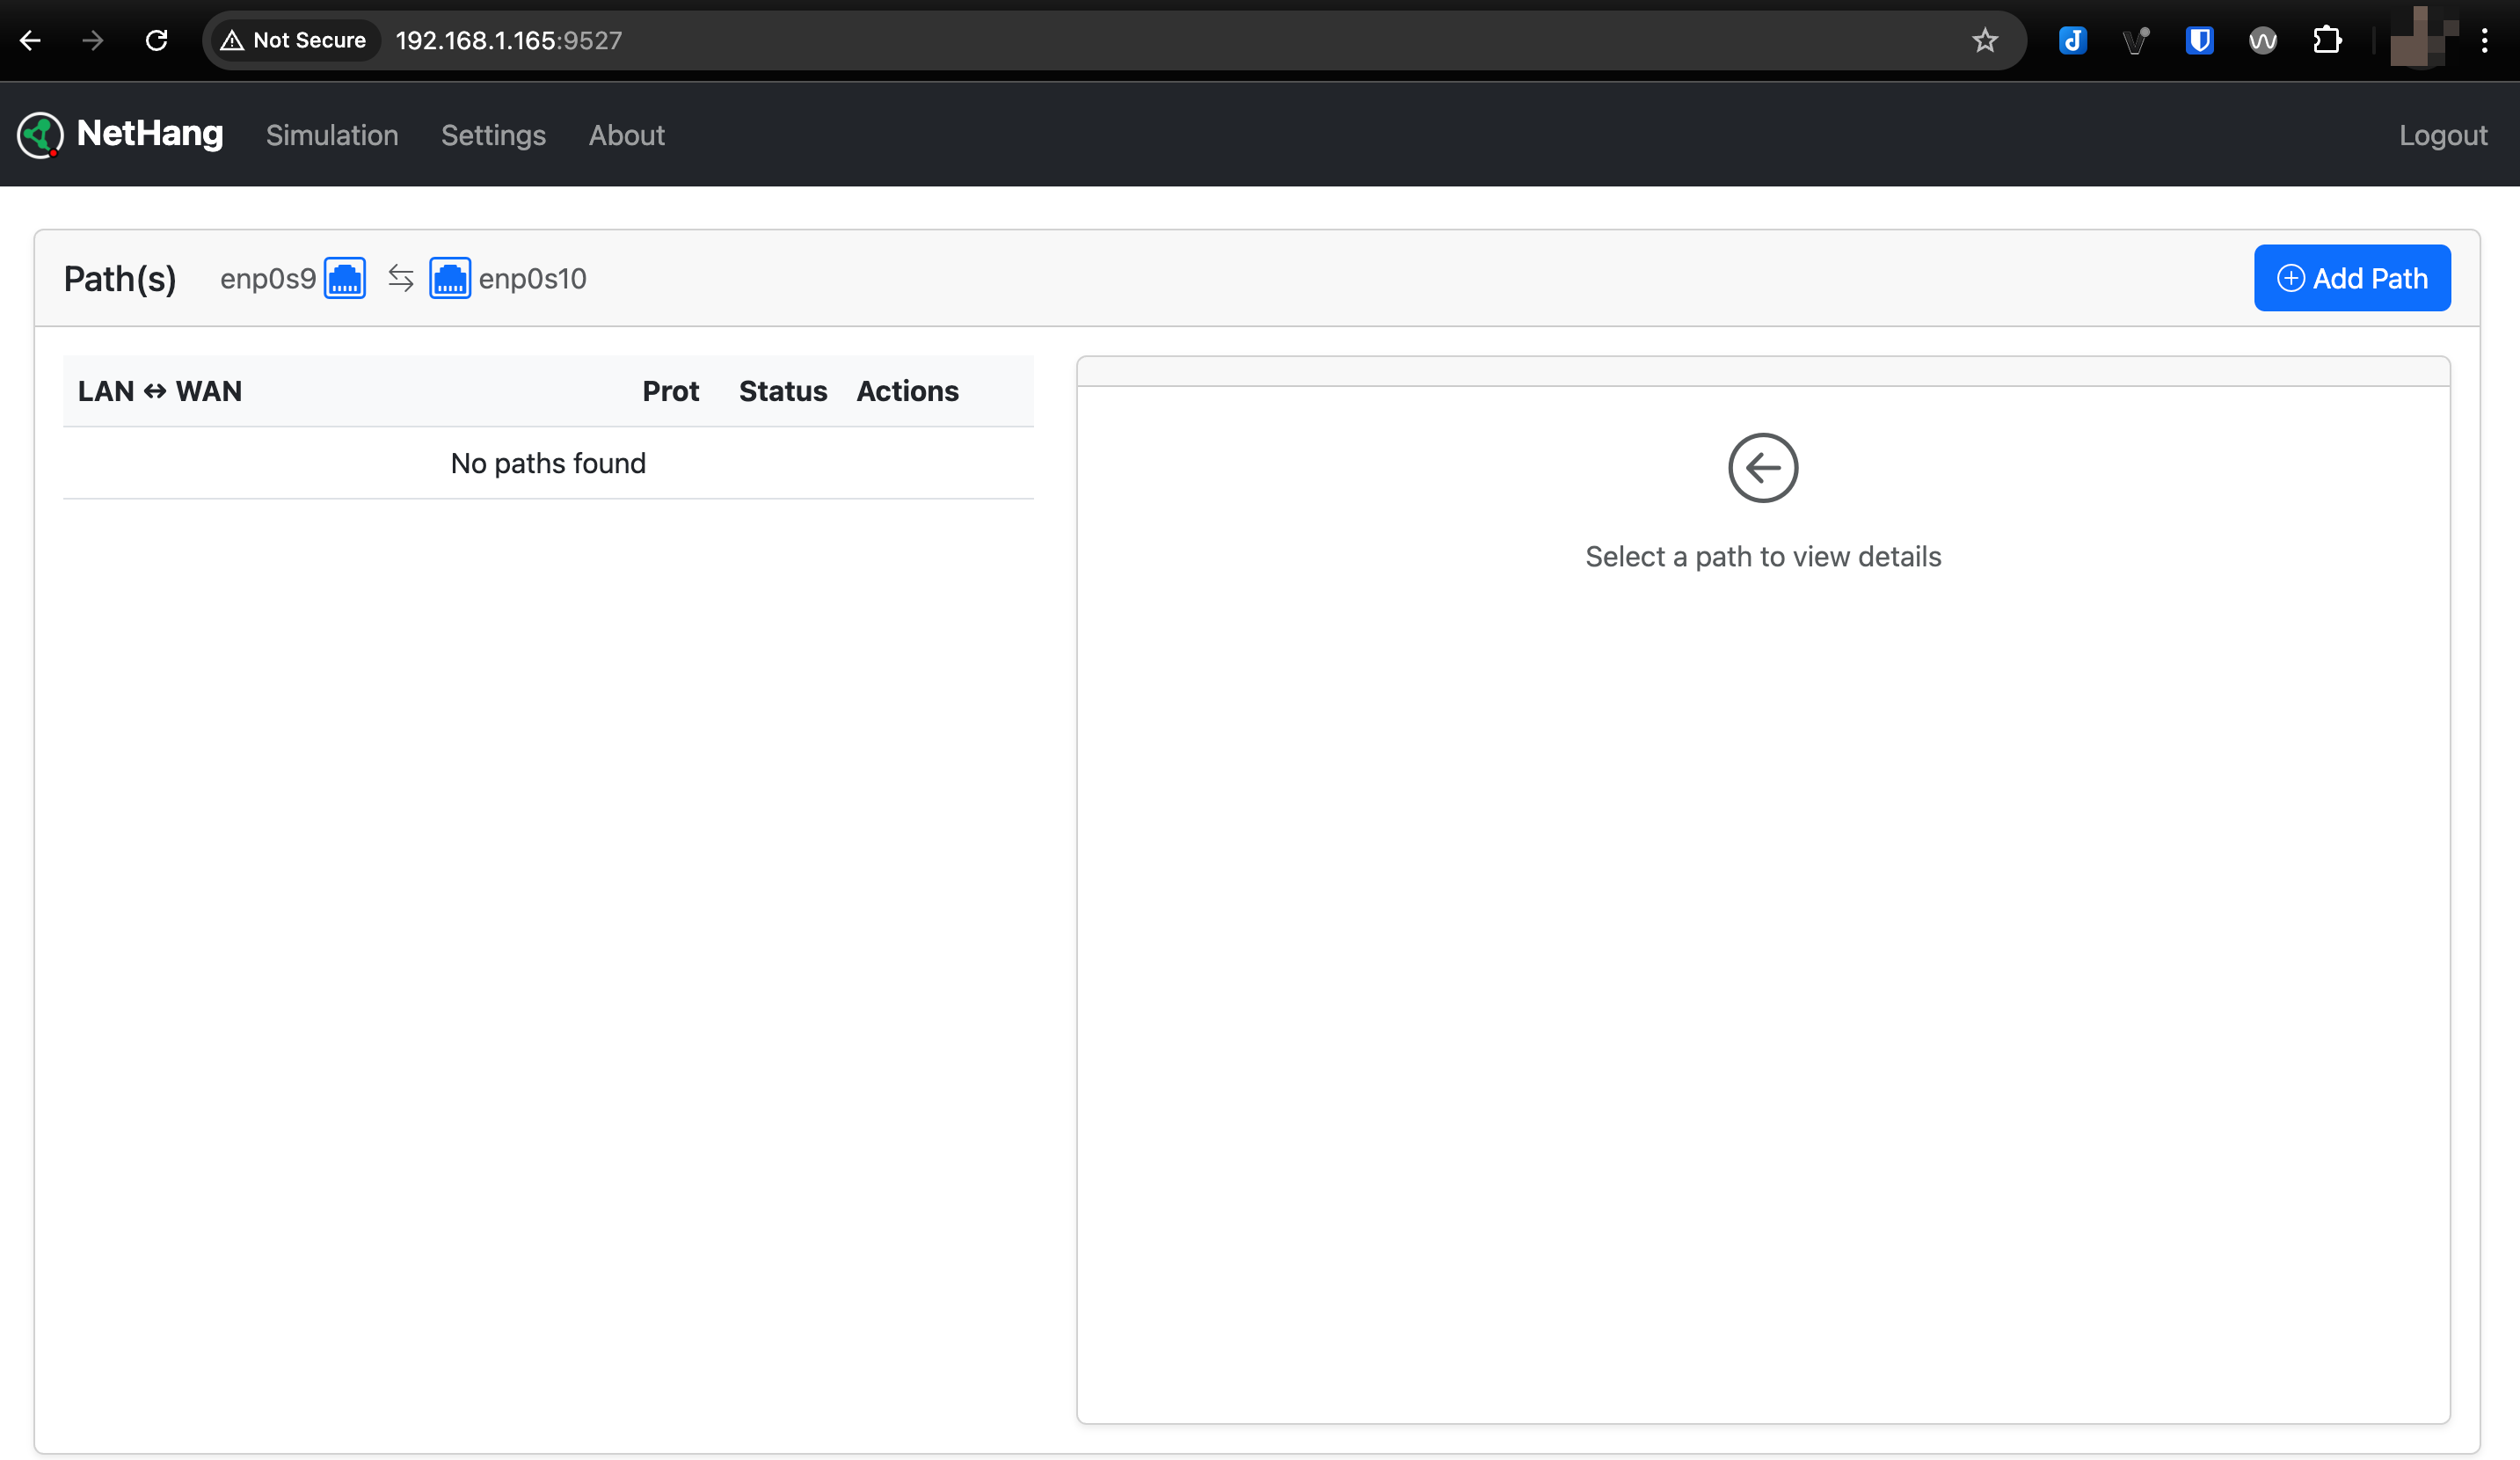
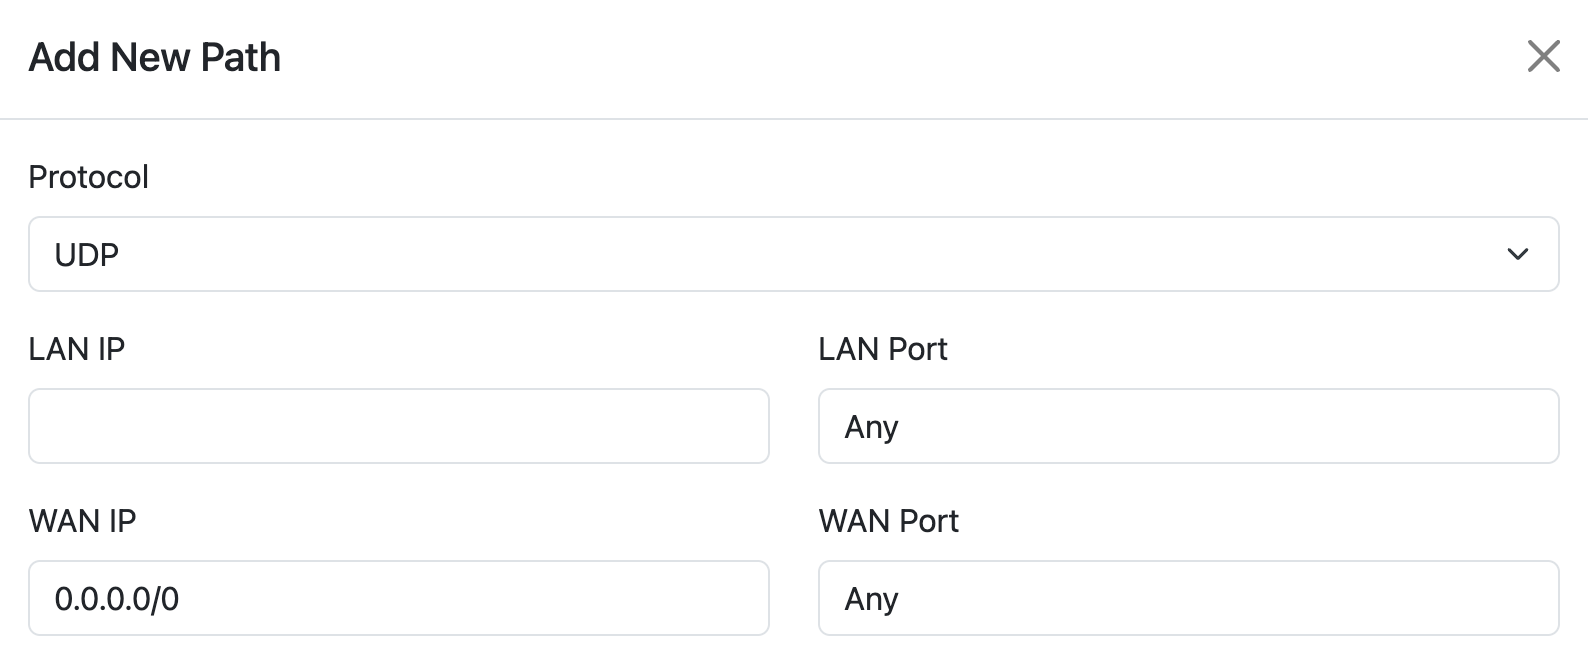
Path
A path represents a connection between your User-Equipment (UE) and the Application Services. Each path can be configured with:
Protocol
TCP, UDP, or IP
IP Address
Source and destination IP addresses
Port
Port numbers (for TCP and UDP)
Models
Models are pre-configured network paths that simulate common network conditions.
Custom Settings
You can customize the network settings for each path.
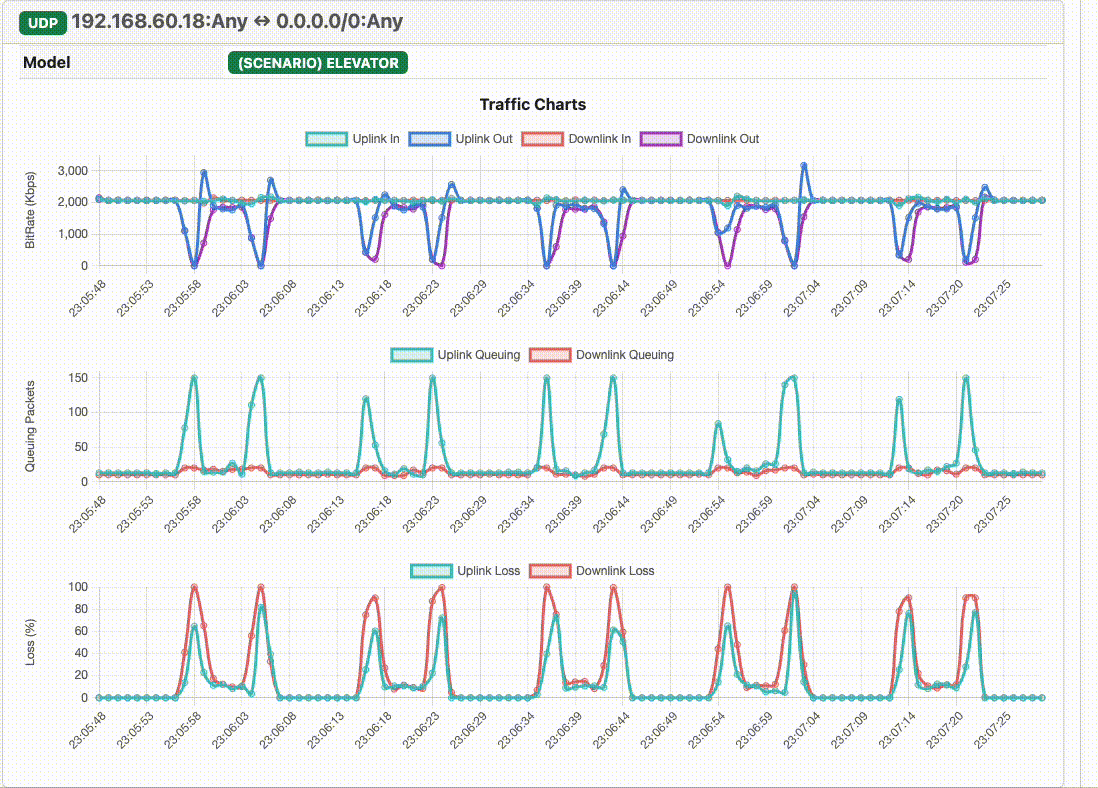
Monitoring
The application provides real-time monitoring of network conditions through three charts:
Throughput
Shows the bit rate for both uplink and downlink traffic.
Queuing
Displays the number of packets in the queue.
Loss
Shows the packet loss rate over time.
Future Plans
Provide with more Models
More models to choose from.
Support more platforms
Debian, OpenWRT, etc.
Support recording statistics
Support recording statistics to a file or database.
Support more custom settings
Frame overhead size, Jitter distribution, Packet loss distribution, Rate limit burst size & ceil rate. etc.
FAQ
NetHang is a tool for simulating network conditions in a controlled environment. It allows you to test your network applications under various network conditions.